Payroll Relief: How to Enter New Employees and Contractors
ADD NEW EMPLOYEE/CONTRACTOR IN PAYROLL RELIEF
Add a New Employee into Payroll Relief
Login under admin access
Link: app.payrollrelief.com
Right menu : people icon: ‘employees’
Now you should see the screen: 'Employee/Contractor Setup’ screen.
Login under admin access
Link: app.payrollrelief.com
Right menu : people icon: ‘employees’
Now you should see the screen: 'Employee/Contractor Setup’ screen.
Adding New Information:
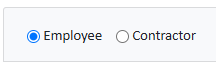
Ensure that you have selected "Employee" or "Contractor" from the field to the left of the employee/contractor name drop-down list.
For a new employee, click 'Add Employee' at the bottom action bar. (+ Sign)

Entering Data: Fill in the fields as follows:
Social Security Number (SSN): Enter the employee's SSN. For contractors, choose between SSN or EIN and input accordingly.
Personal Information: Enter full name, address, gender, date of birth, and race/ethnicity (for workers' compensation purposes).
Contact Details: Add phone numbers and email addresses.
Portal Access (Optional): For enabling employee/contractor portal access, select 'Allow Access' and assign a login name.
*You can enter an SOC code if applicable by state law.
Setting Up Employment Information
For Employees:
Accessing Employment Setup: Go to 'Employee/Contractor Setup>Employment'. Use the Employee icon to navigate if necessary.
Filling Employment Fields:
Employment Type: Choose between Full-Time or Part-Time.
Specific Indicators: Indicate if the employee is a corporate officer, seasonal, statutory employee, etc.
Compliance Dates: Enter critical dates like Hire Date, Last Review Date, and Termination Date.
Job Information: Add job title and classification.
Status: Mark the employee as Active or Inactive.
Saving the Information: Click 'Save' after entering all details.
For Contractors:
Contractor Specific Fields:
Indicate the work state and whether the contractor is subject to federal withholding, state withholding, and workers' compensation.
Input contract date, W-9 date, and job title.
Specify if the contractor should not generate Form 1099.
Status and Notes: Mark as Active or Inactive and add any additional notes.
Saving Contractor Information: Click 'Save' to finalize the entries.
Saving and Managing Portal Access:
Accessing Employment Setup: Go to 'Employee/Contractor Setup>Employment'. Use the Employee icon to navigate if necessary.
Filling Employment Fields:
Employment Type: Choose between Full-Time or Part-Time.
Specific Indicators: Indicate if the employee is a corporate officer, seasonal, statutory employee, etc.
Compliance Dates: Enter critical dates like Hire Date, Last Review Date, and Termination Date.
Job Information: Add job title and classification.
Status: Mark the employee as Active or Inactive.
Saving the Information: Click 'Save' after entering all details.
Contractor Specific Fields:
Indicate the work state and whether the contractor is subject to federal withholding, state withholding, and workers' compensation.
Input contract date, W-9 date, and job title.
Specify if the contractor should not generate Form 1099.
Status and Notes: Mark as Active or Inactive and add any additional notes.
Saving Contractor Information: Click 'Save' to finalize the entries.
Click 'Save' to store the information.
Click 'Save' to store the information.
Other Notes
Utilize 'Reset Password' for existing employees or contractors to generate a new portal password.
Additional Employee Details: For employees, indicate their location, department, and group if available.
Note: Ensure compliance with the Social Security Number Verification Service for accuracy in employee details. Regularly check the Dashboard for any flagged issues.
Related Articles
Payroll Relief: How to Set Up Direct Deposit for Employees or Contractors
Introduction This article provides step-by-step instructions for setting up direct deposit for employees or contractors, including how to allocate funds to one or multiple accounts. Setting up direct deposit allows employers to streamline payroll ...Payroll Relief: Mobile App for Employees
The Payroll Relief mobile app is a powerful and convenient tool designed to give employees quick and easy access to essential payroll information right from their smartphones. Whether you need to view your pay stubs, check your W-2s, or review other ...Payroll Relief: How to Create a New Pay Type
Steps to Create a New Pay Type (Visual Walkthrough) Step 1: Access Payroll Relief Open your browser and navigate to the Payroll Relief dashboard at https://app.payrollrelief.com/Dashboard. Step 2: Open Employer Setup Navigate to the Employer Setup ...Payroll Relief: how to change a pay rate or add pay
If you need to update an employee’s pay rate, change someone from hourly to salaried, or add other types of pay (like overtime or bonuses), Payroll Relief makes it simple through the Compensation tab. This article walks you through how to adjust or ...Payroll Relief: How to Process Health Insurance 2%
This article walks you through the process of entering a 2% Health Insurance adjustment in Payroll Relief. This step-by-step guide will ensure the payroll is correctly recorded with the necessary adjustments. By following the instructions, you'll be ...