Payroll Relief: How to Create a New Pay Type
Steps to Create a New Pay Type
(Visual Walkthrough)
Step 1: Access Payroll Relief
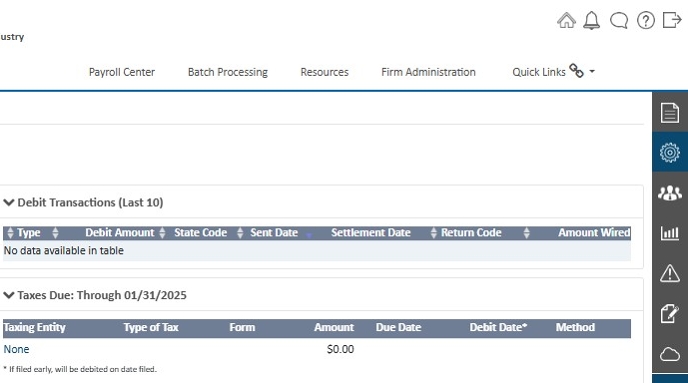
- Open your browser and navigate to the Payroll Relief dashboard at https://app.payrollrelief.com/Dashboard.
Step 2: Open Employer Setup
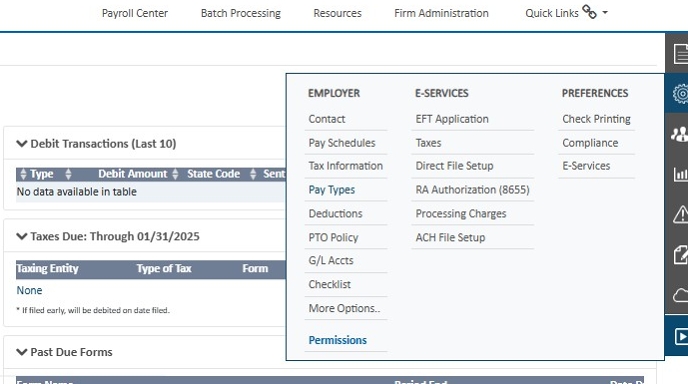
- Navigate to the Employer Setup section by clicking the gear icon in the rightmost menu.
Step 3: Open the Pay Types Screen
- Click on the Pay Types option to view the available pay types. This will bring up a list of default pay types such as Regular, Overtime, and Vacation.
Step 4: Add a New Pay Type
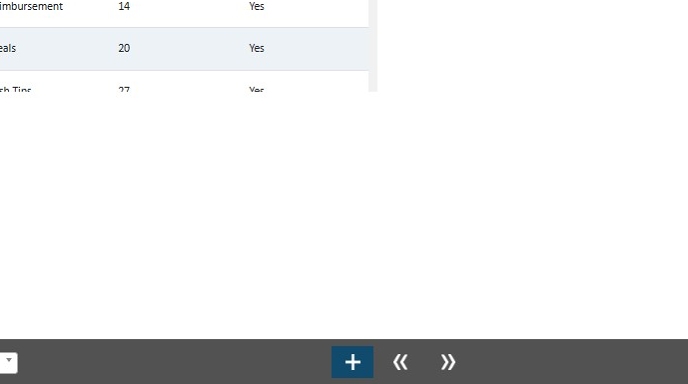
Click the + (plus) icon at the bottom of the screen to add a new pay type.
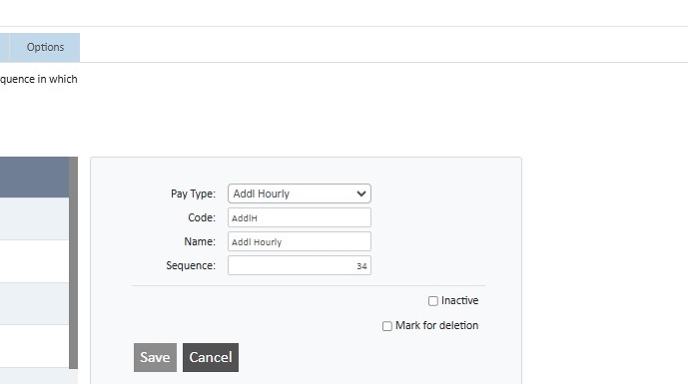
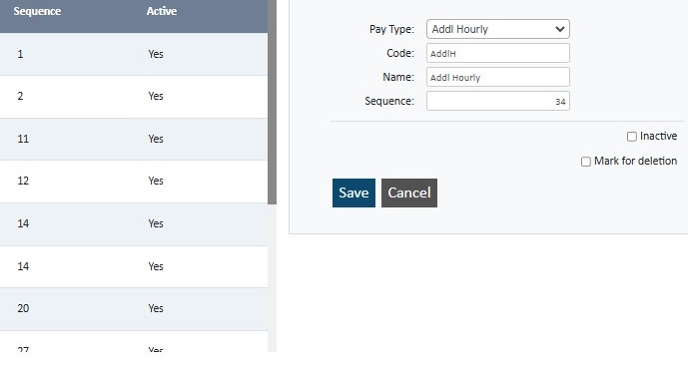
In the dialog box that appears:
- Select a Pay Type from the dropdown menu.
- Enter a unique Code. The code is a short identifier used in the Payroll Entry Worksheet and reports.
- Enter a descriptive Name to differentiate between pay types. For example, name an overtime pay type “Overtime - Double Time.”
- (Optional) Adjust the Sequence to determine the order of the pay type on reports and worksheets.
Step 5: Save the Pay Type
- Click Save to finalize the new pay type. Your changes will now appear in the pay types list.
Additional Instructions for Specialized Pay Types
If setting up specialized pay types (e.g., Clergy, Meal Allowance, or Auto Allowance):
- Select the appropriate Tax Code.
- Adjust tax-exempt settings for Federal, FICA, FUTA, State, or Local taxes as needed.
- Mark as Non-Cash if applicable (e.g., for meal allowances).
Troubleshooting
Duplicate Pay Type Code
- Each pay type must have a unique code. Ensure no other pay type shares the same code.
Pay Type Not Visible in the Payroll Entry Worksheet
- Verify the sequence number. Lower numbers appear higher on the worksheet.
Unable to Edit a Pay Type
- Pay types that have been used in processed payrolls cannot be edited. In this case, create a new pay type instead.
Tax Settings Not Appearing
- Ensure you have selected a pay type that supports tax adjustments, such as Clergy or Allowance types.